The Chicken Coop Project
So we decided that part of our plans for Dragonfly Farm and well let's be honest for our little Bear aka Alegra were that we were going to build a Chicken Coop. So since we are pretty poor overall we came up with a plan between us that revolved around used pallets.... So step one of any good Farm building project is to make sure that you put absolutely nothing down on paper... Procrastinating is the enemy of progress...lol.
Step 1.
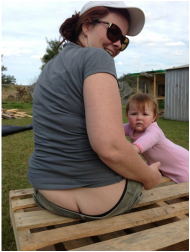
Off to our local hardware store Bunnings Forster where we met our favorite customer service man "Gordo". He's everything that a good old fashioned Aussie hardware store should be... He's funny, a total larican and knows soooo much about so many things including how to be a total tight ass and not buy even half as many materials as we thought we needed. Thanks Gordo for suggesting the pallets from out back... Saved us at least $200 bucks we reckon and yes they were freeeeee....!!!! And yes we got the plumbers crack as part of the deal...lol
Step 1.
Off to our local hardware store Bunnings Forster where we met our favorite customer service man "Gordo". He's everything that a good old fashioned Aussie hardware store should be... He's funny, a total larican and knows soooo much about so many things including how to be a total tight ass and not buy even half as many materials as we thought we needed. Thanks Gordo for suggesting the pallets from out back... Saved us at least $200 bucks we reckon and yes they were freeeeee....!!!! And yes we got the plumbers crack as part of the deal...lol
Step 2.
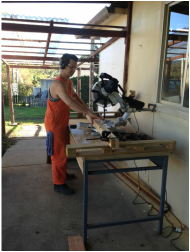
Let the building begin. Couldn't have done it without this awesome Duel Bevel Sliding Mitre Saw... when we first saw it we fell in love but the price tag would have been a month of saving and we just couldn't afford that. But the god's were merciful and two weeks after we walked away it came on sale....whooohoooo... made about ten hand tools and many nicks and cuts totally redundant. What used to take hours now took mere minutes and ohhhhh so accurate thanks to the inbuilt laser measurer... Yes yes we know... bit in love with the new toy...lol
Let the building begin. Couldn't have done it without this awesome Duel Bevel Sliding Mitre Saw... when we first saw it we fell in love but the price tag would have been a month of saving and we just couldn't afford that. But the god's were merciful and two weeks after we walked away it came on sale....whooohoooo... made about ten hand tools and many nicks and cuts totally redundant. What used to take hours now took mere minutes and ohhhhh so accurate thanks to the inbuilt laser measurer... Yes yes we know... bit in love with the new toy...lol
Step 3.
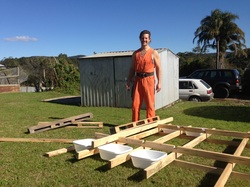
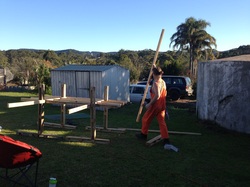
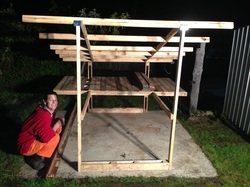
Lay all the "Non structural" (same as saying cheap as chips) pine out on the ground to get an idea of the design and see if what is in our heads matches up with real life =). Yeah we had to put out the laying boxes.. it helped us visualise the little individual suites our girls would blissfully lay their eggs in... Nothing is to much for our lovely girls =).
As you can see we opted to do half cut joints to make sure that the entire structure fit together snugly and gave our girls a nice level home. With the high winds in our area for a lot of the year we didn't want to rely on screws alone.
Step 4.
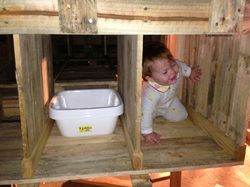
A quick shot of the Bear letting mummy and daddy know they have her complete confidence.
In the very next picture she decided at just one week after her 1yr Birthday she would celebrate by lifting that strategically placed 20kg dumbell out of the way to assist with her house relocation to a more sunny place in the yard....lol.
And yeah we are totally proud that thanks to her Cameron Highlander heritage she has been wearing 2 year old clothes tightly since she was 6 months old...lol... They raise em big Down Under...=)
Step 5.
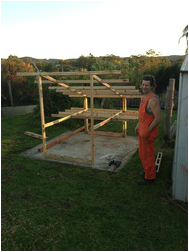
Up goes the middle level and on go the legs. Perfect parts for the job were the single slat pallets that Gordo gave us... Was a bit wobbly at first but as soon as the screws went in things got better.
Up goes the middle level and on go the legs. Perfect parts for the job were the single slat pallets that Gordo gave us... Was a bit wobbly at first but as soon as the screws went in things got better.
Step 6.
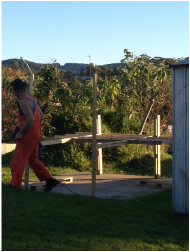
Decided it's a whole lot easier to get things true and square if we didn't build on an uneven grass incline...lol. See who says us Aussie's aren't a sharp bunch.
Decided it's a whole lot easier to get things true and square if we didn't build on an uneven grass incline...lol. See who says us Aussie's aren't a sharp bunch.
Step 7.
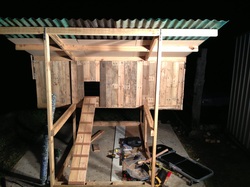
Ok so we skipped a few steps but in our defense it's hard to take pictures with the sun going down on a magical day and putting the roof on with only two people =)
Ok so we skipped a few steps but in our defense it's hard to take pictures with the sun going down on a magical day and putting the roof on with only two people =)
Step 8.
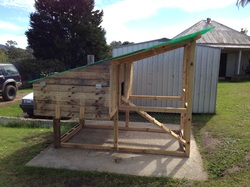
A moment of happiness as the structure starts to look like a "Chook Mansion"...lol Feelin pretty damn happy with ourselves at this point... so wish iPhones had a timer function so we could both be in the picture but out of the three of us one is to young and just wants to eat the phone, the other has a bit of a shaky hand thanks to a Central tremor soooooo.... well it's usually the Boss Lady behind the lens =)
A moment of happiness as the structure starts to look like a "Chook Mansion"...lol Feelin pretty damn happy with ourselves at this point... so wish iPhones had a timer function so we could both be in the picture but out of the three of us one is to young and just wants to eat the phone, the other has a bit of a shaky hand thanks to a Central tremor soooooo.... well it's usually the Boss Lady behind the lens =)
Step 9.
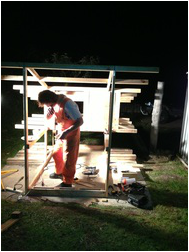
Working late into the night... Well 6pm in the middle of an Australian winter which isn't as bad as many other places but you know what it's like... you get used to a certain temp and it felt a lot colder than 6 Degree's Celsius...
As you can see the pallets came in very handy for the Chook Palace part of the Shed.. made a perfect floor for the girls little boxes and where their roost will be.
Step 10.
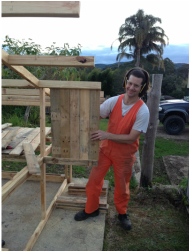
Day 2 begins late in the day...yawn... it's sooo hard to sleep when your excited about a project and keep thinking of new things... damn brain... But as you can see day two begins with putting up dividers so the girls get their privacy when they need it most =).
Used a router to cut groves in the bottom section and then slid pallets cut to size into them with screws at the top to hold them in....
Step 11.
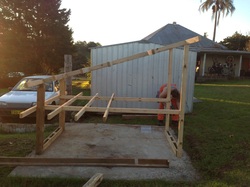
Day 2 ends... another cold night but as you can see the house part of the shed is pretty close to finishing stage... =)
Day 2 ends... another cold night but as you can see the house part of the shed is pretty close to finishing stage... =)
Step 12.
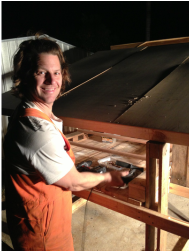
Putting on the underlay before the roof goes on.. Praying to the rain gods that it doesn't rain on this stuff... This will hopefully keep our girls warm during winter and cool during summer... Thanks once again to Gordo at Bunnings for his idea of using this stuff... and again it's freeeeee.... apparently they use it to lay long loads of finished wood on so it doesn't get scratched by the pallet underneath. Another good score.
Putting on the underlay before the roof goes on.. Praying to the rain gods that it doesn't rain on this stuff... This will hopefully keep our girls warm during winter and cool during summer... Thanks once again to Gordo at Bunnings for his idea of using this stuff... and again it's freeeeee.... apparently they use it to lay long loads of finished wood on so it doesn't get scratched by the pallet underneath. Another good score.

Step 13.
Having a well earned rest with a very tired Daddy... All rugged up now that the days work is finished... As you can see we are raising a proudly Aussie Tom Boy...she's a Vegimite Kid through and through... And to all our Couchsurfers who have come to stay with us over the years that say ewwww that stuff is nasty we say this... If a 1yr old loves it then clearly it is not he product that is the problem...lol
Having a well earned rest with a very tired Daddy... All rugged up now that the days work is finished... As you can see we are raising a proudly Aussie Tom Boy...she's a Vegimite Kid through and through... And to all our Couchsurfers who have come to stay with us over the years that say ewwww that stuff is nasty we say this... If a 1yr old loves it then clearly it is not he product that is the problem...lol
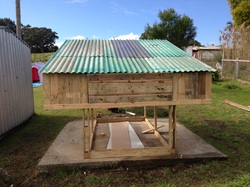
Step 14.
Day 3. Yes the roof is one... same problem as last time with the "in progress pictures" two sets of hands required to put up the kindly donated fibreglass roofing stips "Thanks Brother Bradley" for giving these two us at just the right time.
Day 3. Yes the roof is one... same problem as last time with the "in progress pictures" two sets of hands required to put up the kindly donated fibreglass roofing stips "Thanks Brother Bradley" for giving these two us at just the right time.

Step 15.
Not really a step, just an opportunity to show the side view of the individual box's for up to 6 happy little ISA Browns to live and lay in.
Not really a step, just an opportunity to show the side view of the individual box's for up to 6 happy little ISA Browns to live and lay in.
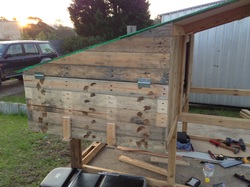
Step 16.
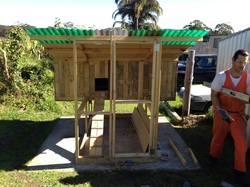
The back view... We made a door out of... yes you guessed it. Even more pallets. This will enable us to sweep out the coop and let us keep our girls happy by changing their bedding material so it doesn't get to manky....
The back view... We made a door out of... yes you guessed it. Even more pallets. This will enable us to sweep out the coop and let us keep our girls happy by changing their bedding material so it doesn't get to manky....

Step 17.
Someone put some pants on this kid...lol. Well in her defense we are a family of nudists so we have to give our little Bear the opportunity to get in touch with nature the way God intended...=)
Someone put some pants on this kid...lol. Well in her defense we are a family of nudists so we have to give our little Bear the opportunity to get in touch with nature the way God intended...=)
Step 18.
The side doors go on... On the bottom we made two little simple latches with the help of the Mitre saw to cut groves in the bottom latch section and they simply twist in a circle to lock and unlock. Used a pair of cheap 40c door hinges to hold them open and a little $1.50 latch on the top to hold it up once it's open...
The side doors go on... On the bottom we made two little simple latches with the help of the Mitre saw to cut groves in the bottom latch section and they simply twist in a circle to lock and unlock. Used a pair of cheap 40c door hinges to hold them open and a little $1.50 latch on the top to hold it up once it's open...
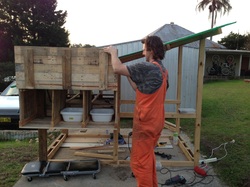
Step 19.
Not really a progress shot just a shot to show anyone who cares to see how it's turning out what the design looks like for the girls and their little homes =). Where Daddy's hand is is where the little latch is to hold the door up...
Not really a progress shot just a shot to show anyone who cares to see how it's turning out what the design looks like for the girls and their little homes =). Where Daddy's hand is is where the little latch is to hold the door up...
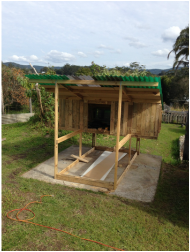
Step 20.
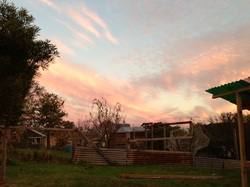
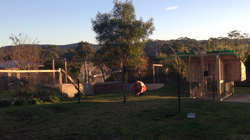
Enjoy the Serenity.... Anyone who has seen the great Aussie movie "The Castle" will get this reference... If you don't get it watch the movie, laugh, cry and then you will get it... We have one rule in our family though and that is at the end of a hard days work we stop and appreciate the beauty of nature.
Enjoy the Serenity.... Anyone who has seen the great Aussie movie "The Castle" will get this reference... If you don't get it watch the movie, laugh, cry and then you will get it... We have one rule in our family though and that is at the end of a hard days work we stop and appreciate the beauty of nature.

Step 21.
Just before sundown, all tuckered out after a hard day of directing the work of Mummy and Daddy... And of course the worlds prettiest mummy looking beautiful as always =). Love you Mumma Bear.
Just before sundown, all tuckered out after a hard day of directing the work of Mummy and Daddy... And of course the worlds prettiest mummy looking beautiful as always =). Love you Mumma Bear.
Step 22.
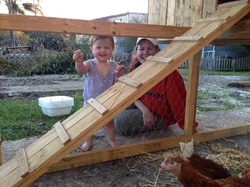
Our girls have a ramp to get into their little Chook Palace. Put together using 2 x 2 long pallets screwed on top of each other and then side by side, used strips of spare wood "once again supplied for free by Gordo at Bunnings" as the rungs for them to get their feet onto.
Also their entry way has been narrowed a bit so that a) the cold wind doesn't get into them in winter and b) so that the light doesn't bother them to much when the sun rises. You can't see it in this picture but above the hole inside are two pallet pieces which were used to screw the short pieces on the front to so they don't flap loose
Step 23.
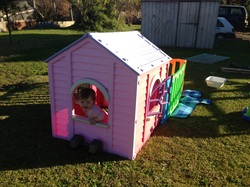
The Bear gives the girls new home her drool of approval... Now that that's taken care of we can put on the Chicken Wire to stop the local foxes from molesting our girls while they sleep... But that's on day 4... Night night.
The Bear gives the girls new home her drool of approval... Now that that's taken care of we can put on the Chicken Wire to stop the local foxes from molesting our girls while they sleep... But that's on day 4... Night night.

Step 24.
Up early on Day 4 and its chilly.... or Brrrr as The Bear calls it. You can tell from Mummy's pretty red nose... 4 Degrees but we are raring to go :)
Up early on Day 4 and its chilly.... or Brrrr as The Bear calls it. You can tell from Mummy's pretty red nose... 4 Degrees but we are raring to go :)
Step 25.
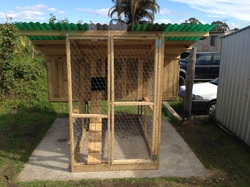
The front door is on not long to go now and everything will be ready for our Clucky little friends to move in...
The front door is on not long to go now and everything will be ready for our Clucky little friends to move in...
Step 26.
Chicken wire is all on including under the bottom of the Chook Shed which will stop the foxes from getting in if the shed is ever over soil instead of concrete (we don't think we will keep it on the soil though as it's much easier to keep the non structural pine from rotting and getting attacked by Termites if it stays on the concrete).
Chicken wire is all on including under the bottom of the Chook Shed which will stop the foxes from getting in if the shed is ever over soil instead of concrete (we don't think we will keep it on the soil though as it's much easier to keep the non structural pine from rotting and getting attacked by Termites if it stays on the concrete).
Step 27.
Once again not really a step just a picture of how it's all wired up for the safety of our girls whilst they snooze. Have to be a pretty determined Fox to get into this little Chook Palace...lol
Once again not really a step just a picture of how it's all wired up for the safety of our girls whilst they snooze. Have to be a pretty determined Fox to get into this little Chook Palace...lol
Step 28.
Putting up the Chicken Wire with the help of a few Star Posts in preparation for our girls moving in. Once they get acclimatized to their new home they will be free to tractor the soil for us to their hearts content.. We will also be building a little addition down below the Chooks house to allow for our 2 little Pekin Ducks which will help with the garden by not only fertilizing like our other girls but also by eating the slugs and snails once we get the Permaculture Garden under way.
Putting up the Chicken Wire with the help of a few Star Posts in preparation for our girls moving in. Once they get acclimatized to their new home they will be free to tractor the soil for us to their hearts content.. We will also be building a little addition down below the Chooks house to allow for our 2 little Pekin Ducks which will help with the garden by not only fertilizing like our other girls but also by eating the slugs and snails once we get the Permaculture Garden under way.
Step 29.
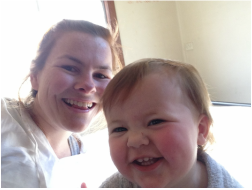
Day 5 and nothing starts the day like a "Saucy Face" from The Bear. Mummy says don't worry the scratch on her nose is only from her own finger nail... Our girls haven't arrived yet and we are sure that none of them would lay a feather on The Bear...=)
Day 5 and nothing starts the day like a "Saucy Face" from The Bear. Mummy says don't worry the scratch on her nose is only from her own finger nail... Our girls haven't arrived yet and we are sure that none of them would lay a feather on The Bear...=)

Step 30.
AND THE GIRLS ARE HERE.....!!!!!! Thank you to the lovely Fi from Cessnock who sold us our lovely 14 week old ISA Browns. It was totally worth the 2 hour drive to meet such a wonderful and kind lady. $25 per hen what a bargain considering that she brings them up in the most loving environment and they are such lovely healthy looking girls. Best part of all is that they had already been wormed and everything.
She even gave us some feed that they need to get us started prior to introducing them to laying pellets. They were happy overnight in the Mitre Saw Box (so smart of Mummy to suggested keeping it for the trip home in the 4WD).
They were a bit reluctant at first but curiosity soon got the better of them and with The Bear (aka Alegra) quietly coaxing them out with her version of Chook Chook...."pronounced Cook Cook" (very proud that is her first real word)..... well they eventually came out and excitedly clucked about.
Step 31.
Very happy little girls... Shaking a little bit "We think from the excitement" but otherwise happy, healthy and glowing in the late afternoon sun.
Very happy little girls... Shaking a little bit "We think from the excitement" but otherwise happy, healthy and glowing in the late afternoon sun.
Step 32.
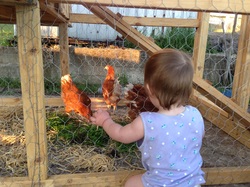
Hello Cook Cooks. My name is The Bear and I will watch you and pet you and make sure that your squeeled at every day =)
Hello Cook Cooks. My name is The Bear and I will watch you and pet you and make sure that your squeeled at every day =)
Step 33.
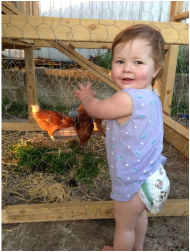
Are these really my Cook Cooks Mummy & Daddy... Yes our Little Bear they are, you make sure your gentle with them and they will let you pet them and hug them once they get used to you.
Are these really my Cook Cooks Mummy & Daddy... Yes our Little Bear they are, you make sure your gentle with them and they will let you pet them and hug them once they get used to you.
Step 34.
To anyone who thinks living in the City is "the best" we say this... One look at a child's smiling face after seeing her first Chook and her happy parents at the sight of that smile should be enough to convince everyone even those who don't have nearly as much as we are fortunate enough to have that moving to the Country and providing for themselves through the wonders of nature is the seat of "True Peace and Happiness".
And the best part is that living in the country costs but a fraction of "Working to Live" in the City.
Step 35.
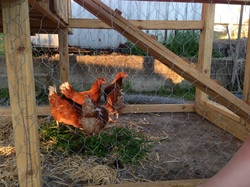
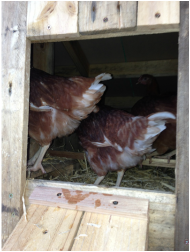
After a long day and some scratch to feed their hungry bellies our girls have retired to their new home for the night... A bit weary at first but once we helped the first brave girl up the ramp the others soon followed and as you can see one of them has already discovered the strips of wood 1" wide going across between the boxes to roost on when they feel like it..
On day 7 we looked in at around 10am (well past when they should have been up and scratching about) to find all 4 girls happily lined up on the two separate roosts (two on each one).
Since then it appears they have all found the box they like the best and are happily clucking away when we get up in the morning. We can't wait to taste our first yummy egg's once the girls start laying at around 20 weeks. Pictures to follow once they are ready to lay for the first time =)
